![]()
Easy Diy Patio Ideas for a Stunning Outdoor Retreat
A patio should be more than just a patch of concrete or a few scattered chairs. It’s an extension of your home, a place to relax, entertain, and soak up fresh air. A few creative DIY touches can turn an ordinary outdoor space into a cozy retreat without breaking the bank. String lights add warmth, repurposed wood creates rustic charm, and potted plants bring life to any setup.
Outdoor rugs define seating areas, while DIY fire pits invite conversation under the stars. Even small spaces can feel inviting with foldable furniture and multi-purpose decor. Budget-friendly projects like painted tiles, pallet benches, or homemade planters can add personality and function.
Every patio has the potential to be a stylish escape with the right mix of textures, lighting, and greenery. A little effort goes a long way in making an outdoor space feel like home.
Table of Contents
ToggleDIY Patio Ideas: Transform Your Outdoor Space
A well-designed patio can turn any backyard into a welcoming space for relaxation, socializing, or dining.
With a little creativity and effort, you can create a beautiful outdoor area without breaking the bank. Here are 10 DIY patio ideas to inspire your next project.
1. Simple Paver Patio
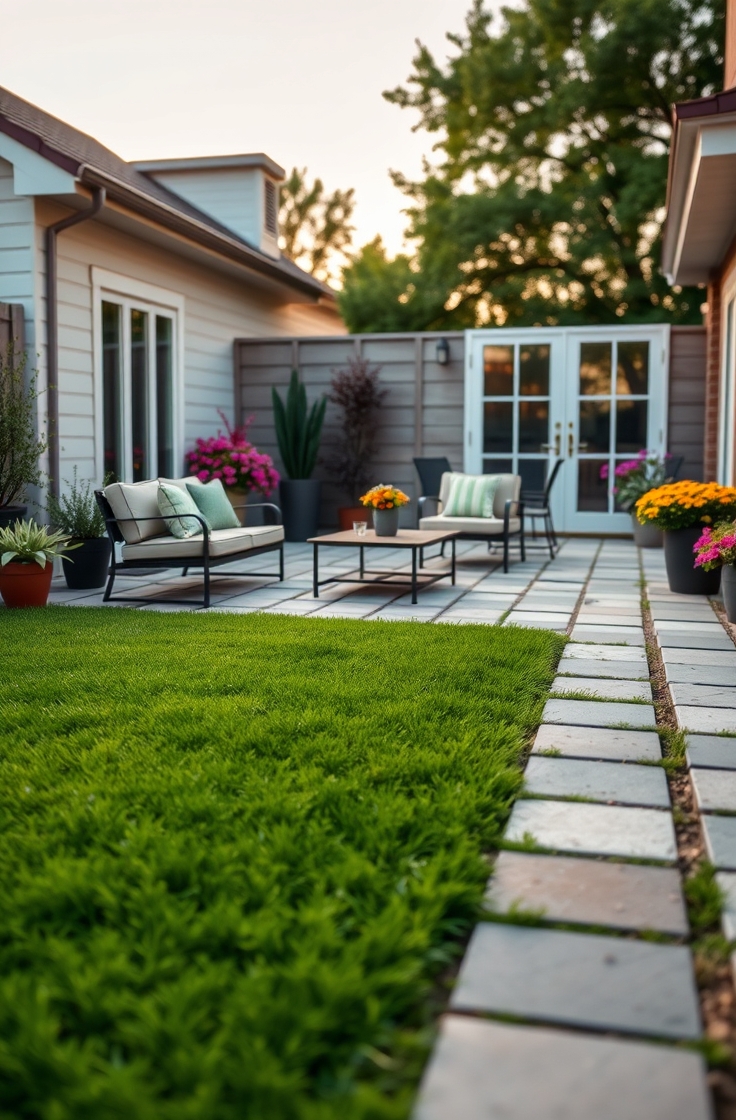
Paver patios are a classic choice for creating a solid, long-lasting surface in your outdoor space. Using concrete pavers, you can design a patio that fits any shape or size.You don’t need to be an expert to install pavers. Just level the ground, lay down a weed barrier fabric, and then arrange the pavers in your desired pattern. You can opt for different colors and textures to create a unique look.
Paver patios are easy to install, look stylish, and are long-lasting. They come in various shapes, sizes, and colors, allowing you to design a customized patio.
Materials Needed:
- Pavers
- Sand
- Gravel (for the base)
- Edging (metal or plastic)
- Shovel
- Rubber mallet
Steps:
- Mark the Patio Area: Measure and mark the area where you want your paver patio.
- Excavate the Area: Dig the ground to a depth of about 4 inches to make space for the gravel and pavers.
- Create the Base: Pour gravel into the excavated area and level it using a rake. Compact the gravel to create a firm base.
- Add Sand: Spread a layer of sand over the gravel and level it.
- Lay the Pavers: Start placing the pavers in the desired pattern. Use a rubber mallet to tap each paver into place.
- Finish the Edges: Install edging around the perimeter to keep the pavers in place. You can use metal or plastic edging for a clean, finished look.
- Fill Gaps: Fill the spaces between the pavers with sand or ground cover plants.
2. Gravel Patio
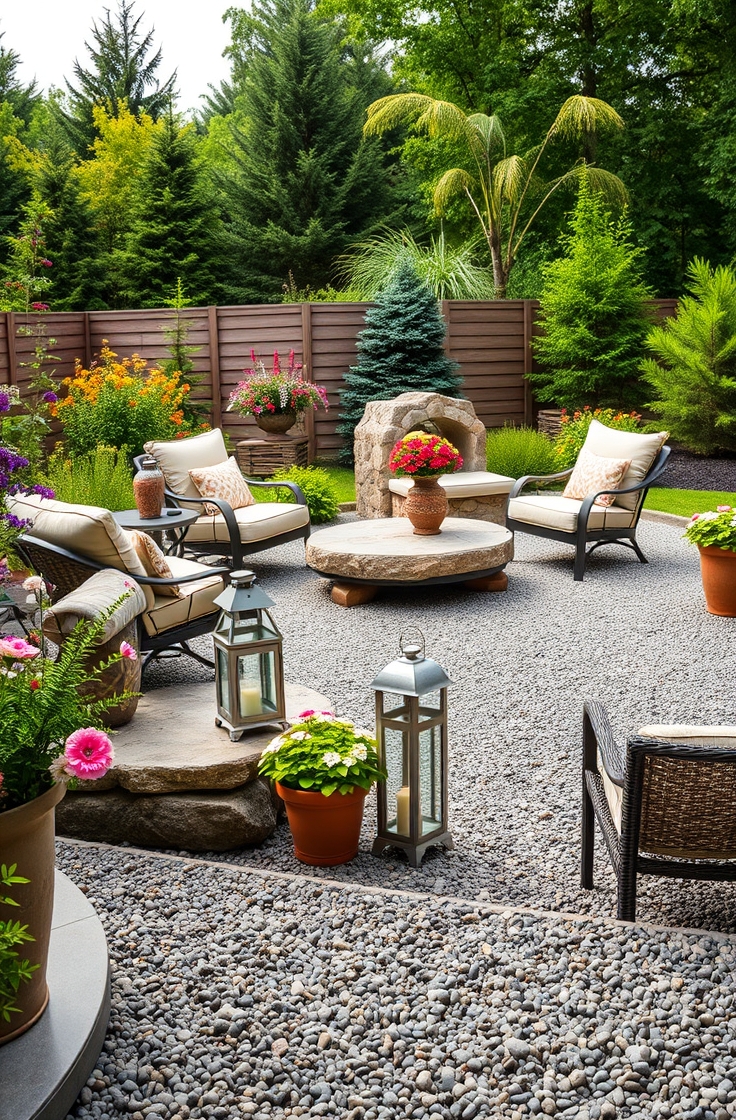
A gravel patio offers a rustic, low-maintenance option that is easy to install. It works well in many backyard styles and provides good drainage. Begin by marking the area where you want the patioDig down a few inches, then line the area with landscape fabric to prevent weeds. Finally, spread your gravel evenly, and you have an attractive and practical outdoor seating area. You can also add some large stones or stepping stones to create paths or add some decoration.
Gravel is an affordable and easy-to-install material that can create a charming, rustic look for your patio. It’s low-maintenance and adds a natural touch to any outdoor space.
Materials Needed:
- Gravel (choose your preferred color or size)
- Weed barrier fabric
- Shovel
- Landscape edging (optional)
- Stepping stones (optional)
Steps:
- Choose the Patio Area: Measure and mark the area where you want the gravel patio.
- Prepare the Ground: Dig the area to a depth of about 2-3 inches. Make sure the surface is level.
- Add Weed Barrier: Lay down a weed barrier fabric to prevent grass and weeds from growing through the gravel.
- Edge the Patio: Use landscape edging or stones around the perimeter of the patio to keep the gravel in place.
- Spread the Gravel: Pour the gravel evenly over the area. Use a rake to smooth it out.
- Add Stepping Stones: Optional—lay down stepping stones to create a walkway or to break up the look of the gravel.
3. Wooden Deck Patio
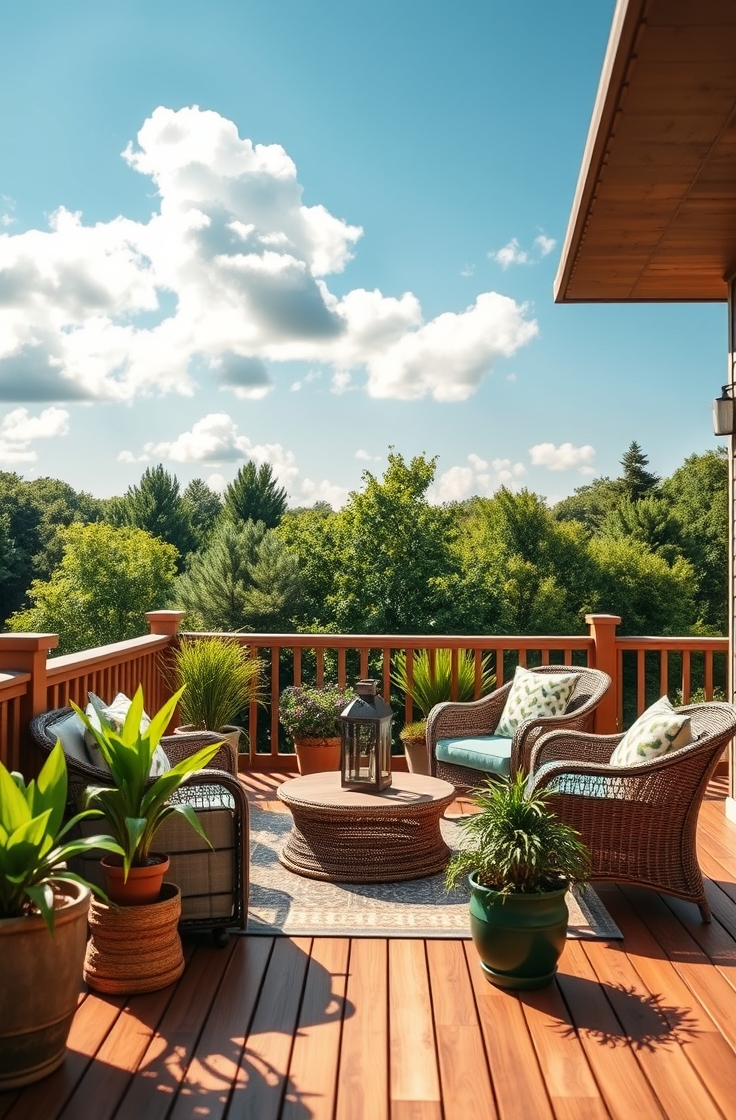
Wooden decks create a warm and inviting atmosphere for your patio. You can build a simple wooden deck with some basic tools. Start by designing the layout and purchasing materials, like pressure-treated wood, deck screws, and a hammer.A wooden deck works well if you want to create a raised patio, especially if your backyard has a slight slope. For a finishing touch, stain or paint the wood to match your home’s exterior or create a bold contrast.
Wooden decks are classic and versatile. They add warmth and charm to your outdoor space and can be customized to fit any style.
Materials Needed:
- Pressure-treated lumber (for the frame and planks)
- Deck screws
- Saw
- Drill
- Concrete mix (for the footings)
- Level
- Measuring tape
Steps:
- Design the Deck: Sketch out the design of your deck and measure the area where you want to build it.
- Prepare the Ground: Clear the area of any grass or plants. You may need to level the ground.
- Build the Frame: Use pressure-treated lumber to create the frame. Use a level to ensure it is straight.
- Install Footings: Pour concrete footings to support the frame. Make sure they are set deeply enough to support the deck.
- Lay the Decking: Secure the wooden planks onto the frame with deck screws. Leave small gaps between each plank for water drainage.
- Finish the Deck: Sand the edges, apply stain or paint, and add railings if desired.
4. Flagstone Patio
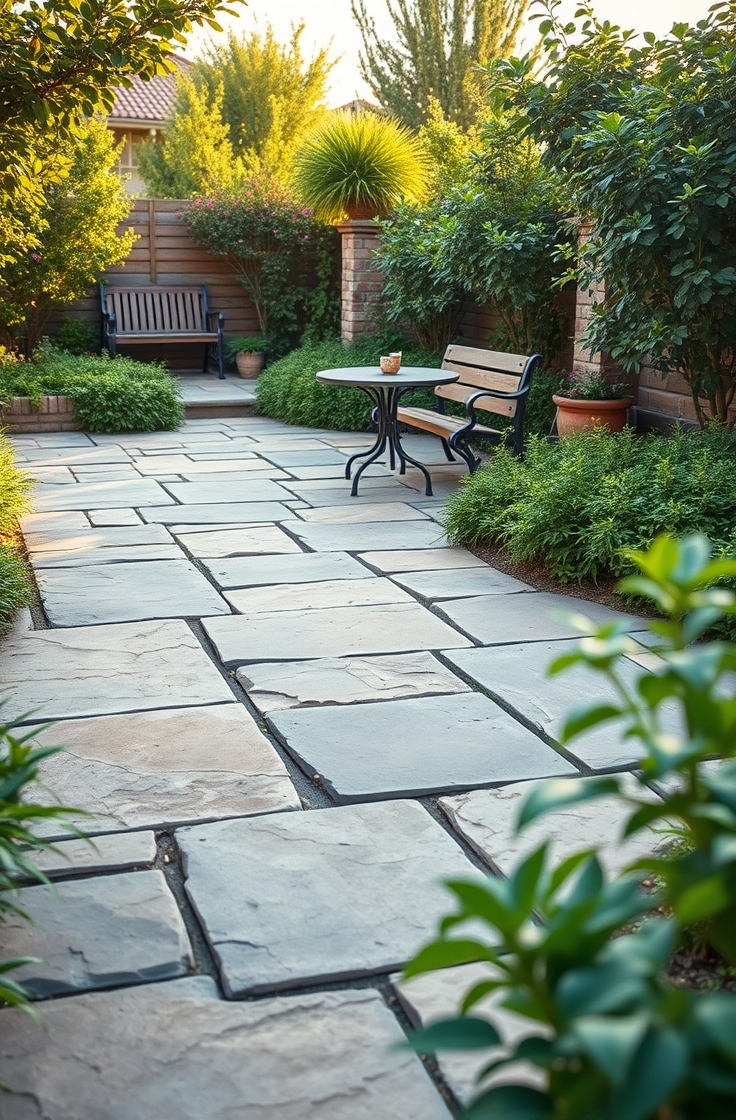
Flagstone is a natural stone that offers a rustic, timeless look for your patio. It is easy to install and looks great with a variety of backyard styles, from formal gardens to casual outdoor spaces. Flagstone comes in irregular shapes, so you can arrange the stones in a pattern that works best for your patio.Lay the flagstone directly on compacted soil or gravel for an easy and durable setup. Add some plants or flowers in between the stones to soften the hard edges.
Flagstone creates a natural, rustic patio that blends well with the landscape. It’s a durable option and can be arranged in many different patterns.
Materials Needed:
- Flagstone
- Sand
- Gravel (for the base)
- Shovel
- Landscape fabric
Steps:
- Plan the Patio: Mark the area where you want to create the flagstone patio.
- Prepare the Ground: Dig out the area to a depth of 4-6 inches.
- Install the Base: Lay down landscape fabric to prevent weeds. Add a layer of gravel and compact it.
- Add Sand: Spread a layer of sand on top of the gravel and smooth it out.
- Place the Flagstones: Start placing the flagstones on top of the sand, leaving small gaps between them. Arrange them in a pattern that suits your style.
- Fill the Gaps: Fill the gaps with sand or ground cover plants to hold the stones in place.
5. DIY Fire Pit Patio
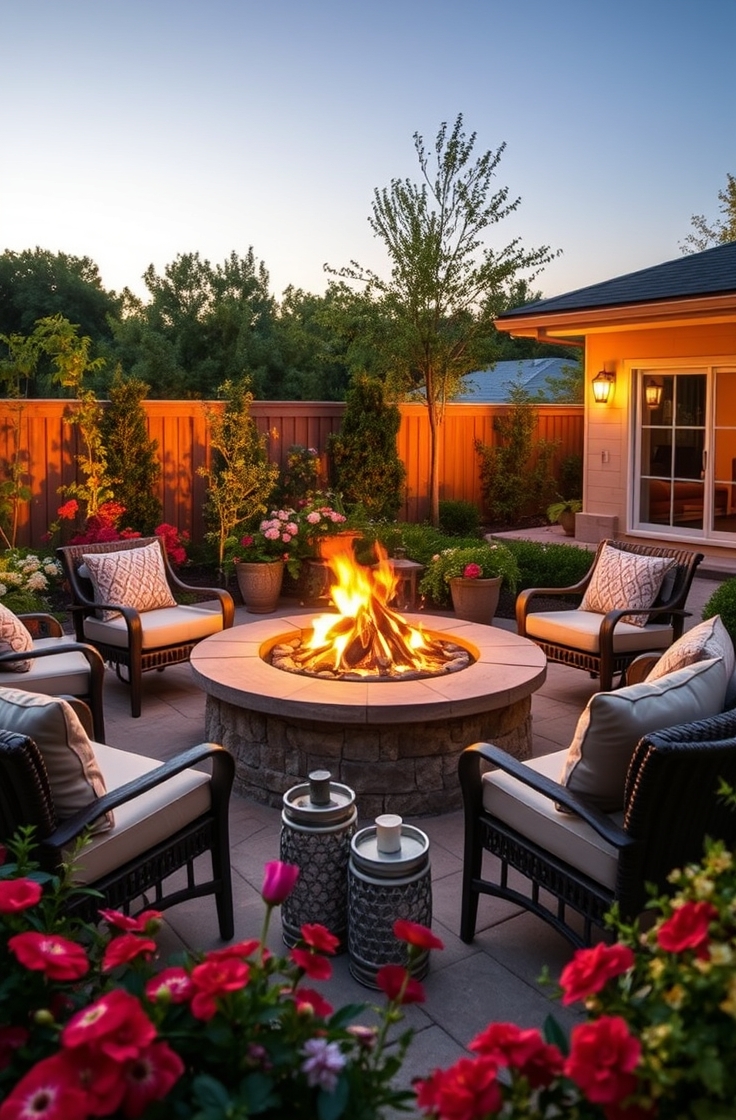
A fire pit is a perfect way to extend your patio’s functionality and enjoy cozy nights outdoors. Building a simple fire pit is a fun DIY project. Use bricks, stone, or metal to create the structure.Make sure to follow safety guidelines and leave enough space for ventilation. Surround the fire pit with comfortable chairs or a bench to create a relaxing outdoor lounge. Add some fairy lights or lanterns to enhance the ambiance at night.
A fire pit is the perfect way to add warmth and atmosphere to your patio, making it ideal for chilly evenings.
Materials Needed:
- Fire pit kit (or bricks/stone for building)
- Gravel
- Fireproof adhesive
- Shovel
- Seating (chairs, benches)
Steps:
- Choose the Location: Select a location for the fire pit that’s away from any structures, trees, or plants.
- Prepare the Ground: Clear the area and level the ground. Dig out a shallow pit.
- Build the Fire Pit: Arrange bricks or stones in a circular pattern. You can use a pre-made fire pit kit for easy assembly or build it yourself with fireproof materials.
- Add Gravel: Fill the bottom of the pit with gravel for drainage.
- Arrange Seating: Surround the fire pit with outdoor chairs, benches, or cushions to create a cozy area.
6. Concrete Slab Patio
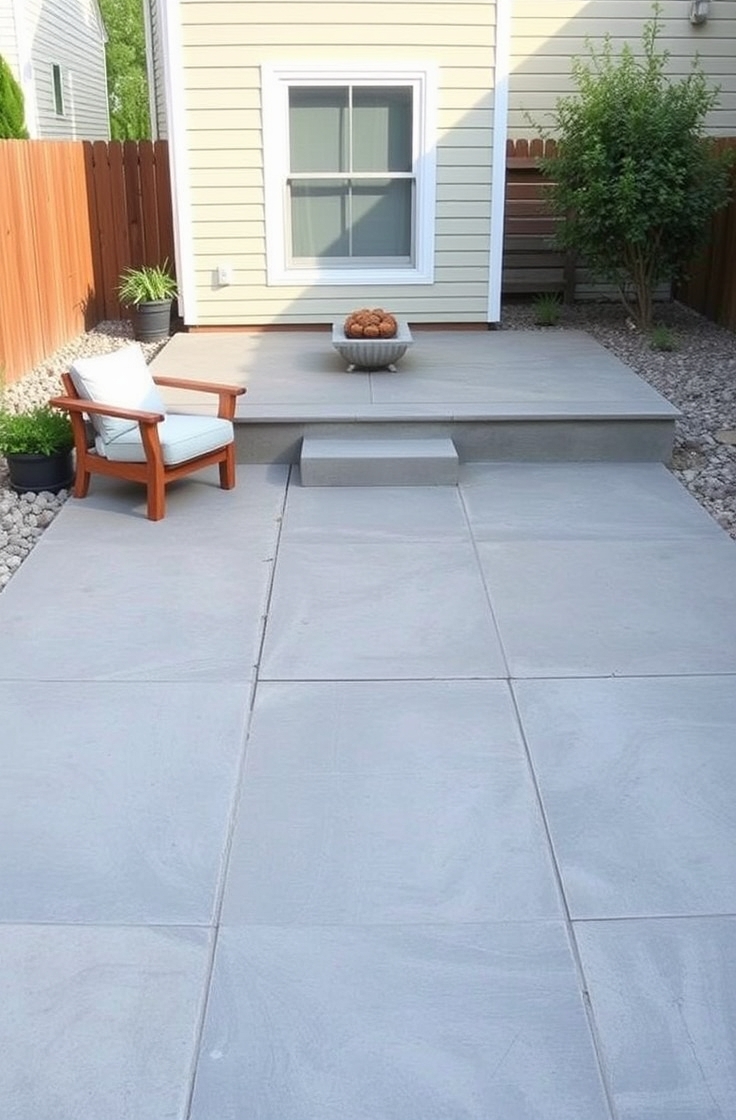
If you want a solid, modern look for your patio, a concrete slab is a great option. Concrete is durable, easy to maintain, and can be molded into different shapes. Start by preparing the ground, ensuring it’s level, and laying down a gravel base.Then, mix and pour the concrete into a wooden frame. Smooth the surface, let it dry, and you have a sturdy, long-lasting patio. You can enhance the design by staining or stamping the concrete to mimic stone, brick, or wood textures.
A concrete slab patio is sleek, durable, and requires little maintenance. It works well in modern outdoor spaces.
Materials Needed:
- Concrete mix
- Wooden forms
- Shovel
- Trowel
- Level
- Reinforcing wire or rebar
Steps:
- Prepare the Area: Measure and mark the space where the concrete will be poured. Excavate the area to a depth of 4-6 inches.
- Create Wooden Forms: Build wooden forms around the edges of the patio to hold the concrete in place.
- Reinforce the Concrete: Lay down reinforcing wire or rebar inside the forms to add strength to the concrete.
- Mix and Pour Concrete: Mix the concrete according to the instructions. Pour it into the forms and use a trowel to spread it evenly.
- Smooth the Surface: Use a trowel to smooth the surface of the concrete and remove any air bubbles.
- Finish and Cure: Allow the concrete to cure for at least 24 hours. You can apply a stain or decorative finish after it has set.
7. Outdoor Garden Patio
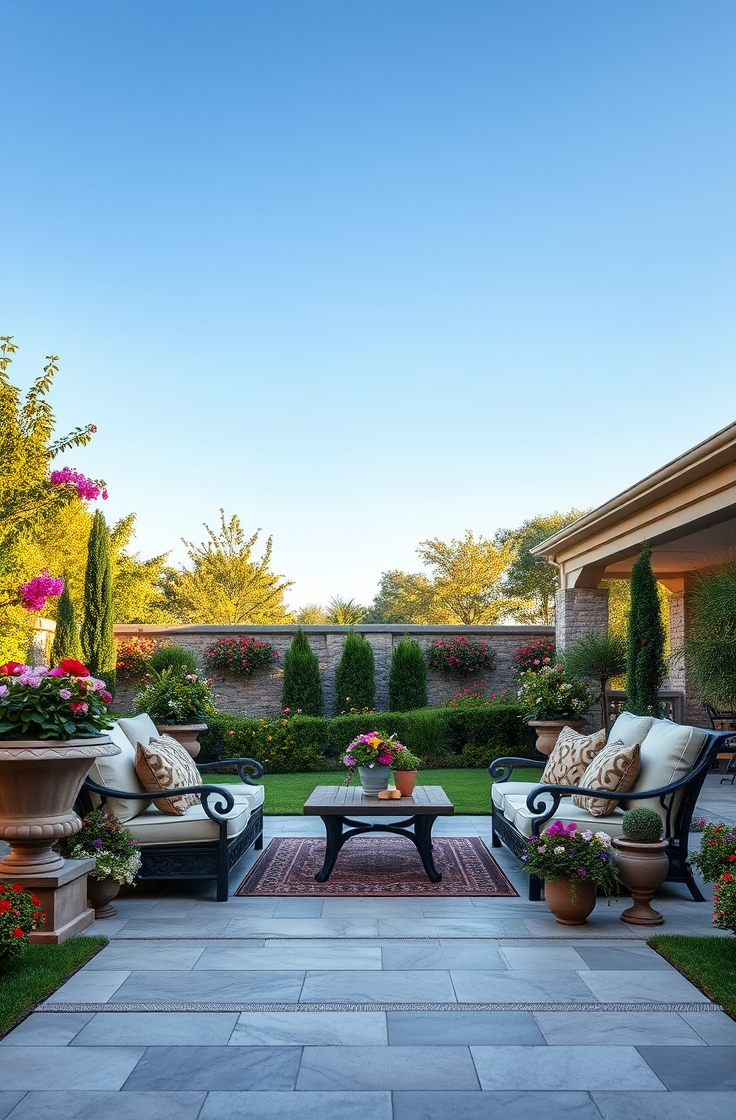
Turn your patio into an extension of your garden by adding plants, flowers, and greenery. Use large planters or garden beds around the edges of the patio to create a lush atmosphere. You can also add climbing vines or trellises to bring vertical interest.For a more organized look, use raised garden beds, which can also help control the placement of plants. You’ll not only enjoy the beautiful scenery but also improve the air quality and attract local wildlife like birds and butterflies.
A garden patio creates a peaceful, serene outdoor space that blends seamlessly with nature. It’s perfect for relaxing, reading, or enjoying a meal surrounded by flowers, herbs, and other plants. A garden patio can include planters, paths, and outdoor furniture, transforming your backyard into an oasis.
Materials Needed:
- Pavers or stones for the patio surface
- Landscape fabric
- Mulch or gravel (optional for filling between stones)
- Garden plants (flowers, shrubs, herbs)
- Pots or raised garden beds
- Outdoor furniture (benches, chairs, tables)
- Outdoor lighting (optional)
Steps:
- Choose the Location: Select a flat area in your yard that receives the right amount of sunlight for the plants you plan to grow. A spot with some natural shade works well for a garden patio.
- Prepare the Ground: Clear the area of any grass or weeds. Level the ground to ensure a stable base.
- Install Landscape Fabric: Lay landscape fabric over the ground to prevent weeds from growing through the patio.
- Add Stones or Pavers: Create the patio surface by laying pavers, flagstones, or stepping stones in the desired pattern. You can choose a herringbone, grid, or random pattern, depending on your preference. Leave small gaps between the stones for a natural look.
- Fill Gaps (Optional): If you want a more cohesive look, fill the gaps between the stones with gravel or mulch to hold them in place. You can also plant small, creeping plants in these gaps for a greener appearance.
- Add Plants and Garden Features: Place potted plants around the patio or install raised garden beds for flowers, herbs, or vegetables. Consider planting climbing vines on nearby trellises or a pergola for a beautiful, vertical garden element.
- Decorate with Furniture: Arrange outdoor furniture like a bench, chairs, or a small table to create a comfortable seating area. Choose materials that complement the natural beauty of the garden.
- Install Outdoor Lighting: To enjoy your garden patio at night, add solar-powered garden lights or string lights around the space. This adds ambiance and highlights the plants and flowers in your garden.
- Maintain the Patio: Regularly water the plants, trim back any overgrowth, and refresh the mulch or gravel as needed. Clean the pavers and stones occasionally to remove dirt and debris.
8. DIY Pergola Patio

A pergola can provide shade and a cozy, stylish element to your patio. Building a DIY pergola can be a straightforward task if you have some basic woodworking skills. You can make a wooden or metal pergola depending on your taste.Use four posts for support and a set of beams that run across the top. You can add climbing plants like vines to give your pergola a more natural look. This addition will create an inviting spot for outdoor meals or relaxation.
A pergola adds a stylish, shaded area to your patio while still allowing you to enjoy the outdoors. It’s perfect for growing climbing plants or hanging lights.
Materials Needed:
- Wooden beams and posts
- Concrete mix
- Screws
- Drill
- Saw
Steps:
- Design the Pergola: Plan the size and shape of your pergola based on your patio.
- Install the Posts: Dig holes for the posts and set them in place with concrete.
- Build the Frame: Attach horizontal beams to the posts using screws. Add rafters to create the pergola’s roof.
- Finish and Decorate: Optional—add climbing plants or hanging lights to enhance the look.
9. Tile Patio
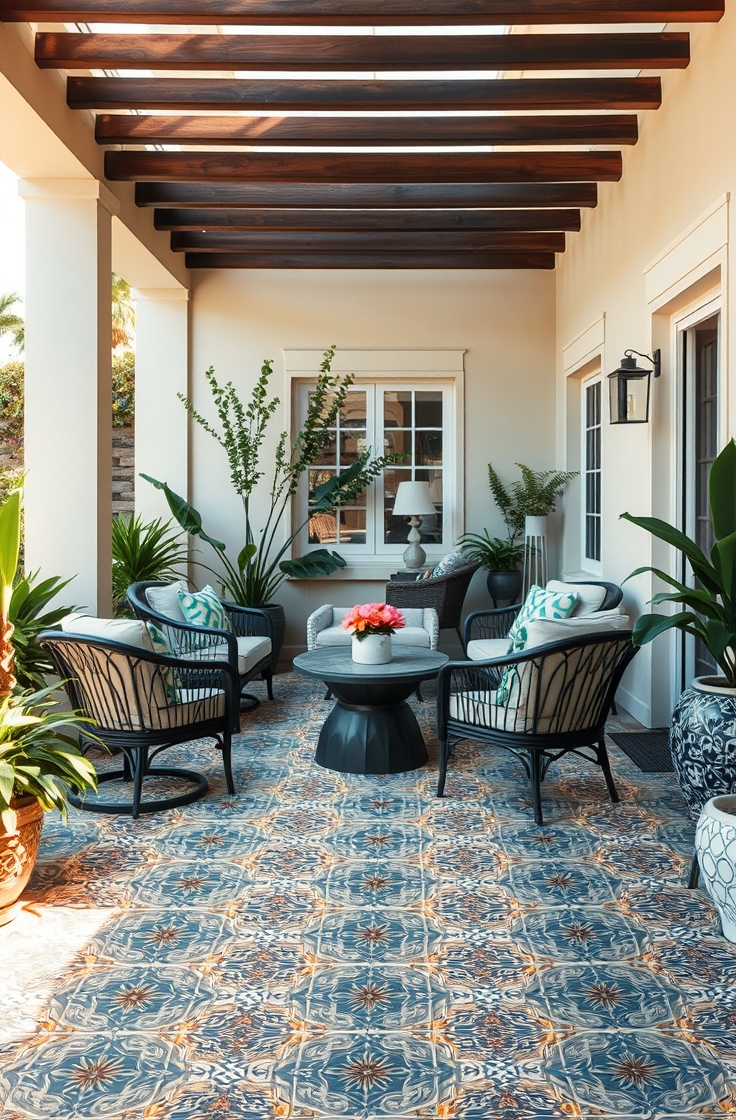
If you prefer a more polished look, consider using outdoor tiles to cover your patio area. There are many outdoor tiles available, including porcelain, ceramic, and stone options. Tiles are easy to clean and maintain, and you can create different patterns, colors, and textures to suit your style.To lay outdoor tiles, start by preparing the surface, applying a thin layer of adhesive, and placing the tiles carefully. Grout the gaps between the tiles, and let everything set. This type of patio can be an excellent option for high-traffic areas.
A tile patio gives a polished, sophisticated look to your outdoor space. Tiles are easy to clean and come in various designs.
Materials Needed:
- Outdoor tiles
- Tile adhesive
- Grout
- Trowel
- Level
- Tile cutter (if needed)
Steps:
- Prepare the Ground: Excavate the area and create a level surface.
- Lay Tile Adhesive: Apply tile adhesive to the ground using a trowel.
- Place the Tiles: Start placing the tiles on the adhesive, making sure they are level. Cut tiles as needed to fit along the edges.
- Grout the Tiles: After the adhesive has set, fill the gaps between the tiles with grout.
- Clean the Tiles: Wipe off any excess grout and let the tiles dry.
10. Pallet Furniture Patio
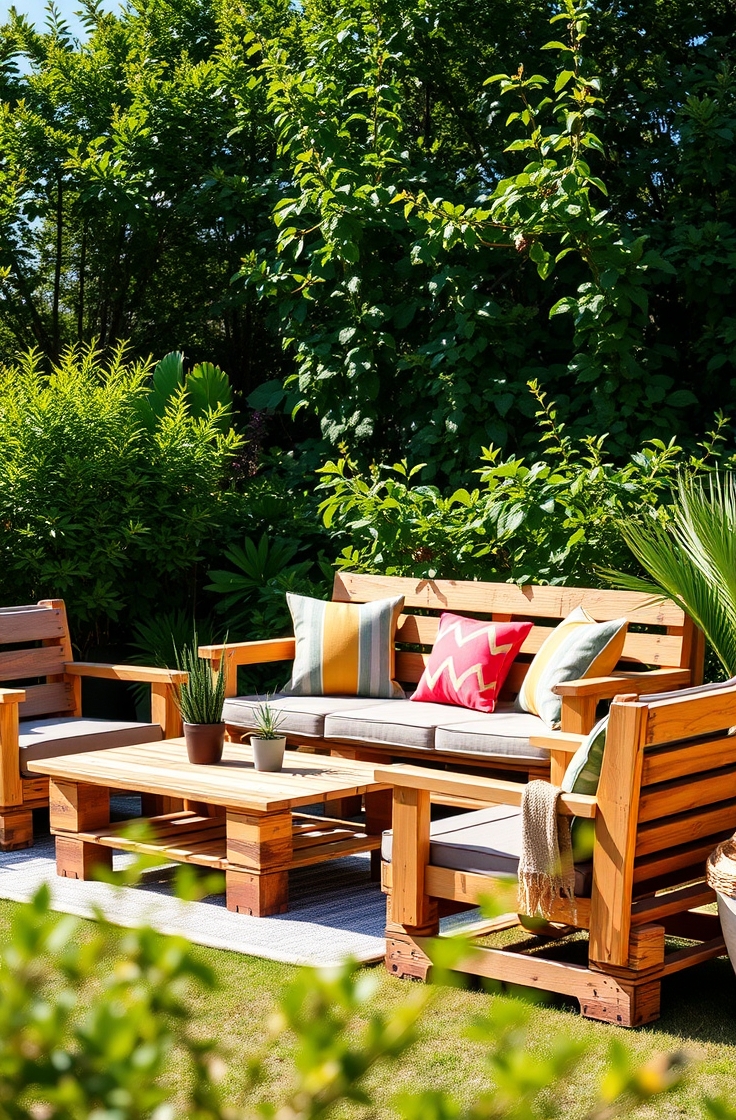
Upcycling old pallets is a fantastic way to create affordable and stylish patio furniture. Pallets can be stacked, painted, and cushioned to make sofas, coffee tables, and even chairs.If you prefer, you can also use pallets as a base for your outdoor patio area. Cover the pallets with cushions or pillows, and add a few rugs to make the space more comfortable. Pallet furniture offers a relaxed, casual vibe that pairs well with any patio.
Repurposing old pallets for outdoor furniture is a great way to create functional and affordable seating for your patio.
Materials Needed:
- Old pallets
- Cushions or foam padding
- Wood screws
- Paint (optional)
- Sandpaper
Steps:
- Find Pallets: Source old pallets from local businesses or online marketplaces.
- Prepare the Pallets: Sand the pallets to smooth out any rough edges.
- Build Furniture: Use the pallets to create a sofa or coffee table by stacking and securing them together. You can also build a bar or storage unit with pallets.
- Add Cushions: Place cushions or foam padding on top for comfort. You can cover them with fabric to match your style.
- Paint and Decorate: Optional—paint the pallets to add color or a protective coat to the wood.
Frequently Asked Questions (FAQs)
Q1: How much does it cost to build a DIY patio?
The cost of building a DIY patio can vary depending on the materials you choose and the size of the area. Simple gravel patios may cost as little as $100, while more complex designs like concrete or wooden decks may cost several hundred dollars. It’s important to plan your project carefully and budget for all necessary materials.
Q2: How long does it take to build a DIY patio?
Building a DIY patio can take anywhere from a few days to a couple of weeks, depending on the size of the area and the materials used. Simple projects like gravel or paver patios can be completed over the course of a weekend. More intricate designs like flagstone patios or wooden decks might require additional time for construction and finishing.
Q3: Can I build a patio on uneven ground?
Yes, it’s possible to build a patio on uneven ground. You may need to level the area before starting your project, which could involve digging, adding gravel, or using a leveling compound. Consider choosing materials like pavers or flagstone, which are more forgiving on uneven surfaces.
Q4: Do I need professional help to build a patio?
While many DIY patio ideas are simple enough to do on your own, you may need professional help for more complex projects, such as concrete pouring or building a large wooden deck. If you feel uncertain about your skills, it’s always a good idea to consult with a professional.
Q5: How do I maintain my DIY patio?
Maintenance depends on the materials used for your patio. For gravel patios, occasional raking may be required to keep them level. Wood decks should be cleaned regularly and resealed every couple of years to prevent wear and tear. Flagstone and paver patios may need occasional weeding and power washing to keep them looking their best.
Conclusion
Creating a DIY patio can transform your outdoor space into a functional and beautiful area for entertainment and relaxation. Whether you choose a simple gravel patio, a cozy fire pit, or a stylish pergola, there are endless possibilities for customization. By using affordable materials and adding your personal touch, you can design a space that suits your needs and enhances your backyard. Take your time, plan carefully, and enjoy the process of building a patio that you can be proud of.