![]()
10 DIY Playground Ideas Kids Will Never Forget
A backyard holds the promise of adventure, especially when it includes a homemade playground that sparks imagination and encourages play. Building one doesn’t demand a professional crew or a massive budget—just a few tools, a weekend’s effort, and a desire to craft joy from scratch. Wooden pallets, old tires, and ropes can become castles, pirate ships, or obstacle courses with a little creativity.
Kids thrive on movement, discovery, and the thrill of their own secret spaces. Instead of settling for store-bought playsets that look like every other yard on the block, consider crafting one-of-a-kind elements that reflect your children’s interests. Think beyond the swing set. Add a mud kitchen, a climbing wall made from scrap wood, or a sensory path with natural textures.
Each build becomes a memory. Each structure invites stories and games that no pre-made kit could ever match. Your backyard doesn’t need to look like a theme park—it just needs to feel like magic. Grab that hammer, gather the kids, and let’s explore DIY playground ideas that turn plain grass into a world of adventure.
Table of Contents
ToggleDIY Playground Ideas
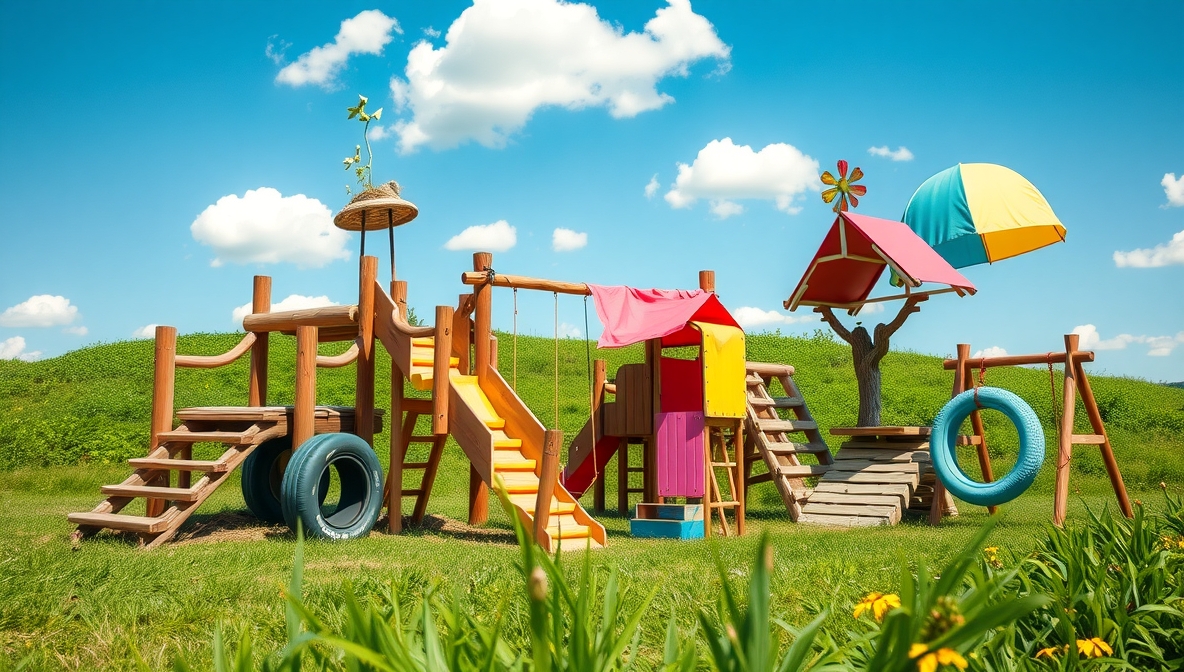
Want to create a fun and safe playground in your backyard? You don’t need expensive equipment. With simple tools and easy steps, you can build your own play area for kids. It keeps them active, happy, and close to home. Below are 10 easy DIY playground ideas you can try. Each idea includes basic materials and simple steps.
1. Tire Climbing Tower
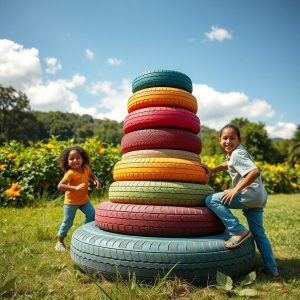
Materials: Old tires, strong rope, drill, bolts, metal rods, outdoor paint
Steps:
- Collect old tires in similar size.
- Clean and paint them with outdoor-safe paint.
- Drill holes in each tire.
- Use bolts and metal rods to stack and secure the tires.
- Tie strong ropes around the tower for climbing support.
Kids love climbing. A tire tower adds adventure to the yard. It’s low-cost and lasts for years.
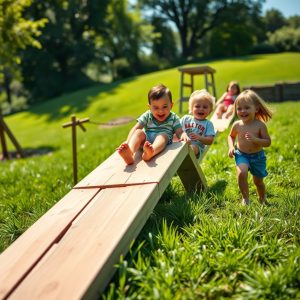
2. Wooden Balance Beam
Materials: Wooden plank (6-8 ft), sandpaper, wood stain or paint, bricks or logs
Steps:
- Sand the wood to avoid splinters.
- Paint or stain it to protect from weather.
- Place the ends on bricks or short logs.
- Make sure it’s steady and low to the ground.
This improves balance and motor skills. It is great for toddlers and older children alike.
3. Sandbox with Seats
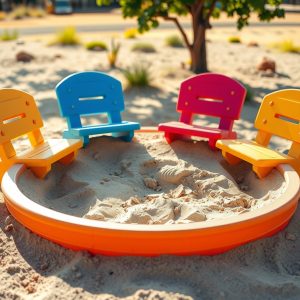
Materials: Wood boards, screws, hinges, sand, plastic sheet
Steps:
- Build a square or rectangle frame using wooden boards.
- Add a bottom layer with a strong plastic sheet.
- Use hinges to make flip-top sides that turn into seats.
- Fill with clean sand.
Kids enjoy digging and building in sand. The seats let them sit and play longer.
4. Rope Bridge
Materials: Thick rope, wood planks, trees or posts, screws, drill
Steps:
- Find two trees or set up strong posts.
- Tie one rope as the base between the trees.
- Secure wood planks over this base rope using screws.
- Tie two ropes on the side for handrails.
This idea builds courage and balance. It works well in larger yards with trees.
5. DIY Slide on a Hill
Materials: Smooth plastic slide, shovel, screws, wood planks
Steps:
- Pick a small hill or build a slope with dirt.
- Place the slide on the hill.
- Use wood planks to create steps on the side.
- Secure the slide with screws or stakes.
Sliding never gets old. It’s a playground classic and easy to install.
6. Climbing Wall
Materials: Plywood, screws, climbing holds (or smooth rocks), drill, paint
Steps:
- Fix a strong plywood sheet to a wall or wood frame.
- Drill in climbing holds or attach smooth rocks.
- Paint the wall with fun colors or patterns.
- Check each grip for strength and safety.
Great for older kids. This helps with strength and problem-solving.
7. Tree Swing
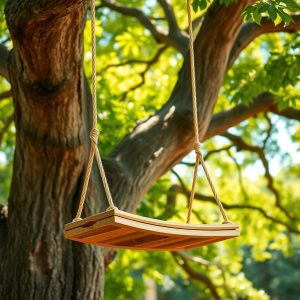
Materials: Sturdy rope, wooden or rubber seat, tree with strong branch
Steps:
- Pick a healthy tree with a thick branch.
- Tie strong rope around the branch.
- Attach a seat to the rope.
- Test the swing before use.
Nothing beats the joy of a tree swing. It’s simple but brings hours of fun.
8. Pallet Playhouse
Materials: Wooden pallets, nails, hammer, tarp or roof panels, outdoor paint
Steps:
- Stack pallets to form walls.
- Nail them together to keep them strong.
- Add a roof using tarp or wooden sheets.
- Paint for fun designs.
This is a secret hideaway for kids. Let them help decorate it. Makes it even more special.
9. Obstacle Course
Materials: Cones, rope, tires, wood planks, buckets
Steps:
- Set up tires for hopping.
- Use cones for zigzag runs.
- Add a rope crawl under two chairs.
- Balance beam from wood planks.
- Use buckets as hurdles.
Keeps kids moving and thinking. Great for daily play or birthday parties.
10. Water Wall
Materials: PVC pipes, plastic bottles, funnel, wood board, screws
Steps:
- Fix a wood board to a fence or wall.
- Cut and attach PVC pipes in different angles.
- Add bottles and funnels to guide water.
- Pour water from top and watch it flow.
Best idea for hot days. Kids enjoy playing and learning about gravity.
FAQs
1. Is it safe to build a playground at home?
Yes, if you use strong materials and build low structures. Always test before kids play.
2. What is the cheapest playground idea?
Tire towers and tree swings cost very little. You can reuse old materials.
3. How can I make sure it is weather-safe?
Paint wood and metal with weather-resistant products. Cover items or store them during rain.
4. Can these ideas work in small spaces?
Yes. Balance beams, climbing walls, and sandboxes fit in small yards.
5. Should kids help build the playground?
Let them paint or help decorate. But leave drilling and cutting to adults.
Conclusion
Building a DIY playground does not need much money. With simple tools and time, you can make fun spaces for your kids. Use things you already have. Involve children in decorating or planning. It makes them feel proud. Start with one idea and grow from there. The joy on their faces is worth every minute.