![]()
Clever DIY Shelving Ideas That Max Out Your Space
Smart storage doesn’t require a trip to the furniture store or a hefty budget. With a little creativity and a few basic tools, anyone can build stylish shelving that adds both function and flair to any room. Wall space often goes unnoticed, yet it holds endless potential for custom shelves that reflect personal style and fit perfectly into awkward corners or underused nooks.
From rustic wooden planks to sleek industrial piping, materials around the house can easily become the foundation of something eye-catching. A kitchen needs more accessible spice racks. A hallway might benefit from floating ledges to showcase framed art or plants. Bedrooms gain character and order with open shelving above desks or headboards.
Every project offers a chance to bring personality into a space while staying practical. Bold colors, unique brackets, or asymmetrical arrangements can elevate even the simplest shelf. There’s no need to follow cookie-cutter designs when imagination can turn storage into a centerpiece.
Grab a screwdriver, pick your favorite idea, and start building shelves that work as hard as they look good
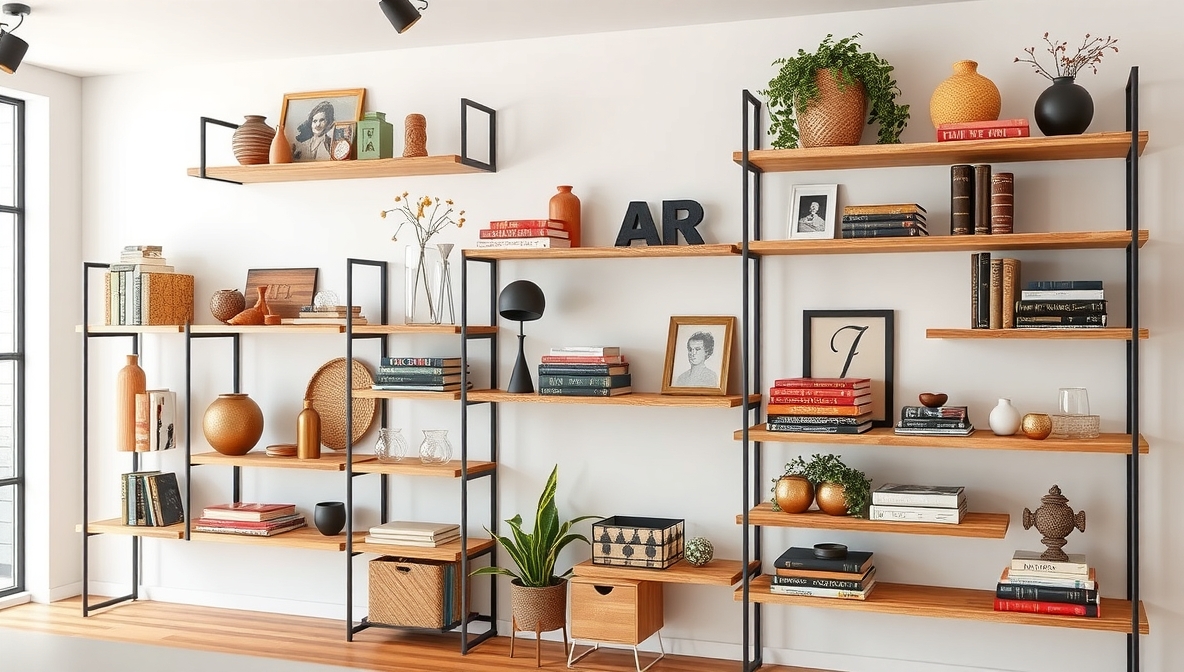
DIY Shelving Ideas
Want more storage space? DIY shelves can help organize your home and decorate your walls. You don’t need to be an expert to build them. A few tools and materials are enough. Let’s look at 10 easy DIY shelving ideas you can try.
1. Wooden Crate Shelves
Materials: Wooden crates, screws, wall anchors, drill, sandpaper, paint or stain.
Steps:
- Sand the crates to remove rough edges.
- Paint or stain them in your favorite color.
- Let them dry completely.
- Use a drill to fix them to the wall with screws and wall anchors.
These shelves are great for books, plants, or toys. Crates give a rustic touch to any room. Stack them in different ways to create a unique design.
2. Floating Shelves
Materials: Wood planks, wall brackets, screws, level, drill, paint or stain.
Steps:
- Cut the wood to the size you need.
- Paint or stain the planks.
- Mark your wall and use a level to keep it straight.
- Attach the brackets and fix the wood on top.
Floating shelves look clean and modern. They are perfect for small rooms. You can use them in bathrooms, kitchens, or bedrooms.
3. Industrial Pipe Shelves

Materials: Wood planks, metal pipes, pipe fittings, screws, wall anchors, drill, stain.
Steps:
- Stain the wooden planks and let them dry.
- Fix the metal pipes to the wall as brackets.
- Place the wooden planks on top of the pipes.
This shelf idea works well in modern or industrial-style homes. The pipes give a strong and bold look. Use thicker wood for heavy items.
4. Corner Shelves
Materials: Wood planks, brackets, screws, wall anchors, saw, paint or stain.
Steps:
- Cut the wood into triangle shapes to fit corners.
- Sand and paint or stain the wood.
- Use brackets and screws to mount the shelves.
These shelves use space that’s often wasted. You can install them in bedrooms, kitchens, or even hallways. They make corners look neat and useful.
5. Rope Hanging Shelves
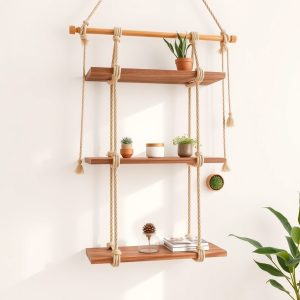
Materials: Wood planks, thick rope, drill, wall hooks, sandpaper, paint or stain.
Steps:
- Drill holes in the corners of each plank.
- Sand and paint the wood.
- Thread the rope through the holes and tie knots to hold the planks.
- Hang the rope on strong wall hooks.
These shelves look great in boho or beach-style rooms. They’re best for light items like plants or candles. Keep them away from areas where they can swing too much.
6. Pallet Wall Shelves
Materials: Wooden pallets, saw, nails or screws, drill, sandpaper, paint or stain.
Steps:
- Cut the pallet into shelf-sized pieces.
- Sand and paint or stain them.
- Use nails or screws to fix them to the wall.
Pallet shelves are affordable and eco-friendly. They add a natural and warm touch to your space. Great for garages, laundry rooms, or rustic kitchens.
7. Bookshelves from Old Ladders
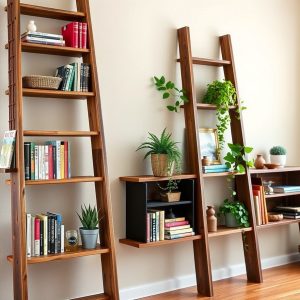
Materials: Old ladder, wooden planks, screws or nails, paint or stain.
Steps:
- Clean and paint the ladder.
- Cut wood planks to fit between the steps.
- Fix the planks with screws or nails to act as shelves.
Turn old ladders into stylish bookshelves. This idea works well for living rooms or studies. A perfect mix of vintage and functional.
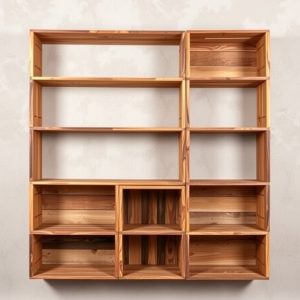
8. Box Shelves
Materials: Wooden boxes, screws, drill, wall anchors, paint or stain.
Steps:
- Sand and paint or stain the boxes.
- Arrange them in a pattern on the floor.
- Once you’re happy, drill them into the wall.
Box shelves let you create your own design. You can mix box sizes and colors. They work well for both storage and decor.
9. Under-Stairs Shelves
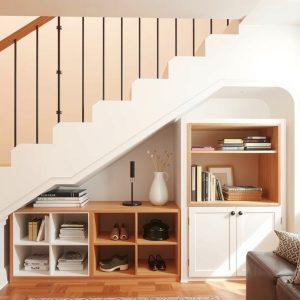
Materials: Wood planks, brackets or custom frames, screws, saw, paint or stain.
Steps:
- Measure the space under your stairs.
- Cut wood to fit the shapes.
- Paint or stain the shelves.
- Fix them to the wall with screws or place in frames.
This space often goes unused. Shelves here are perfect for books, shoes, or storage bins. You can even add baskets for a neat look.
10. Reclaimed Wood Shelves
Materials: Reclaimed wood, brackets, screws, wall anchors, paint or sandpaper.
Steps:
- Clean the wood and remove old nails.
- Sand and paint or leave it natural.
- Use brackets to attach the wood to the wall.
Reclaimed wood adds character. Each shelf tells its own story. These shelves look good in any room and help the planet too.
FAQs
How do I make sure shelves are level?
Use a bubble level tool before drilling. Mark the wall with a pencil where the brackets will go.
What kind of wood is best for DIY shelves?
Pine, oak, and plywood are good choices. They are strong and easy to cut.
Can I paint shelves any color?
Yes. Use wood paint or spray paint. Always let the shelves dry before hanging anything.
Do I need wall anchors?
Yes, if you’re drilling into drywall. Anchors help hold the screws in place.
Are DIY shelves safe for heavy items?
Yes, if you use strong brackets and good wood. Always test them first.
Conclusion
DIY shelving doesn’t need to be hard or expensive. With a few tools and some simple materials, you can build shelves that work for your space. Try one idea or mix a few together. Organize your home and add your own style at the same time. Ready to grab some wood and start building?