![]()
DIY Shutter Ideas That Add Charm and Character to Your Home
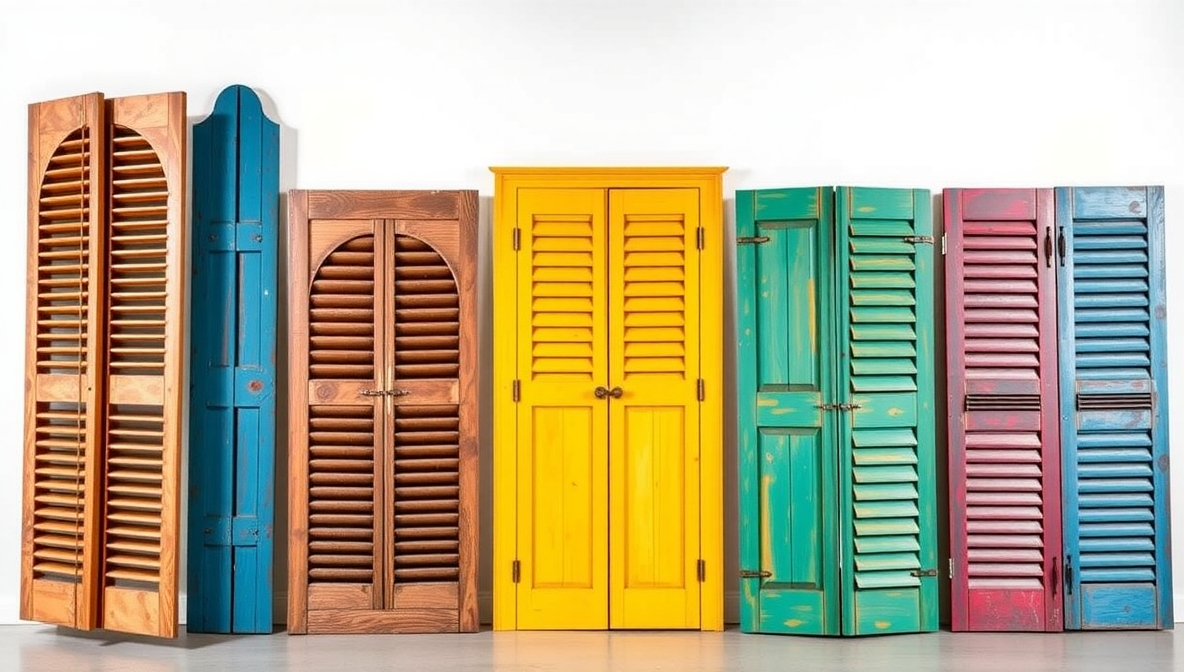
Shutters have long been a staple in home design, but they hold untapped potential for creative expression. Beyond their practical function, shutters can serve as artistic elements, bringing personality and charm to any room. A simple set of wooden shutters can turn into a stylish photo frame wall or a chic magazine holder.
Old shutters find new life as functional room dividers or a rustic backdrop for plants and décor. Mixing colors, textures, and finishes adds dimension and character, allowing each shutter project to stand out as a statement piece. Seasonal decorations take on a fresh canvas with shutters, offering a playful way to showcase holidays or personal milestones.
Incorporating shutters into furniture projects, such as headboards or coffee table accents, merges utility with aesthetic appeal seamlessly. With a few basic tools and a spark of imagination, shutters can evolve from ordinary to extraordinary. Experimentation encourages a sense of adventure, making every DIY shutter project a reflection of individual style and creativity.
DIY Shutter Ideas: 10 Creative Ways to Upgrade Your Home
Shutters are not only useful but also add style to your home. They give windows a finished look and offer privacy and light control. Buying new shutters can cost a lot. Making your own shutters can save money and give your home a unique style. Here are 10 DIY shutter ideas to inspire you.
1. Classic Wooden Shutters

Wooden shutters bring a natural and warm feel to any room. Choose wood that is easy to cut and shape, like pine or cedar. Sand the wood until smooth. Paint it in a color that matches your walls or windows. Attach hinges and mount the shutters to the window frame. Wooden shutters work well inside and outside. They give a cozy, classic look.
Tips: Use waterproof paint for outdoor shutters. Add a protective layer of varnish for longer life.
2. Reclaimed Wood Shutters
Reclaimed wood is old wood that you can reuse. It might come from old furniture or pallets. This type of wood gives a rustic and unique style. Clean the wood well. Cut it to size. Arrange the pieces in a vertical or horizontal pattern. Fix them together with nails or screws. Reclaimed wood shutters give a vintage, warm feeling and are good for old houses.
Tips: Lightly sand rough spots to avoid splinters. Keep some natural marks for charm.
3. PVC or Plastic Shutters
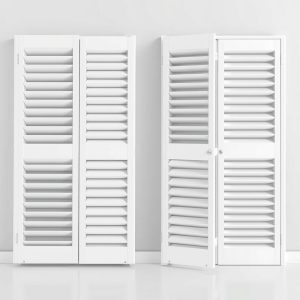
PVC shutters are light and easy to clean. They resist water, making them perfect for kitchens and bathrooms. Measure your window carefully. Cut the PVC sheets to size. Use screws or strong glue to attach slats. Paint is optional, but white or light colors look bright and clean. These shutters are simple to make and last a long time.
Tips: Use a plastic primer before painting for better color.
4. Folding or Accordion Shutters
Folding shutters save space. They open and close easily. Use thin wood or PVC panels. Connect panels with small hinges. Mount the first panel to the window frame. The other panels fold neatly behind it. This style is perfect for small rooms or windows that open often.
Tips: Check that hinges move freely. Add a small handle for easier opening.
5. Shutters with Decorative Cutouts
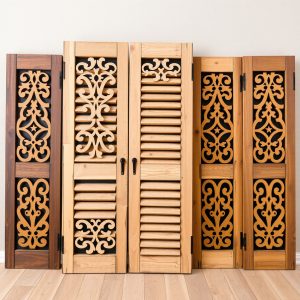
Add personality by cutting shapes into shutters. Hearts, circles, or leaves work well. Choose wood that is thick enough to hold the shape. Draw the design with a pencil. Cut carefully with a jigsaw. Sand edges smooth. Paint or stain the wood. Decorative cutouts make shutters look artistic and unique.
Tips: Keep designs simple for small shutters. Too many cuts can make the wood weak.
6. Shutters with Fabric Panels
Fabric panels add color and softness. Make a wooden frame for the shutter. Attach a fabric piece using staples or small nails. Use lightweight fabric for easy movement. Fabric shutters give a warm and cozy feel. They also allow some light to filter through.
Tips: Choose patterns that match your room. Cotton or linen works best.
7. Vertical Slat Shutters

Vertical slats give a modern look. Cut wooden boards into thin, even strips. Attach them to a horizontal frame. Leave small gaps between each slat. Paint or stain the wood. Vertical slats make windows appear taller. They are simple to build and look neat.
Tips: Keep spacing even for a clean look.
8. Horizontal Slat Shutters
Horizontal slats work well on large windows. Cut wood boards to fit the width. Attach them to vertical supports. Paint or stain the wood. Horizontal shutters make windows look wider. They give a simple, contemporary style.
Tips: Measure carefully to keep boards level.
9. Shutters with Chalkboard Panels
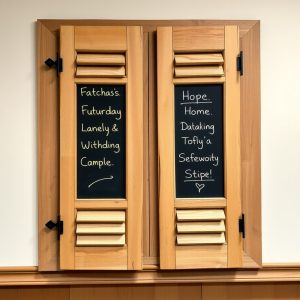
Chalkboard shutters are functional and fun. Attach a chalkboard sheet to a wooden shutter frame. Use it to write notes, reminders, or drawings. Paint the frame to match your room. Chalkboard shutters work well in kitchens, offices, or kids’ rooms.
Tips: Use liquid chalk markers for easy cleaning.
10. Outdoor Plant Shutters
Turn shutters into a small garden. Add small shelves or hooks on wooden shutters. Place potted plants or hanging planters. Mount the shutters near a sunny wall. This idea saves space and adds green to your home. It works well for patios, balconies, or small gardens.
Tips: Use waterproof wood or varnish for outdoor use.
Final Thoughts
DIY shutters add personality and style to your home. They are cheaper than store-bought options and can match your exact taste. Start with simple designs if this is your first project. Over time, try more creative ideas like fabric panels or cutouts.
Shutters improve privacy, control light, and decorate windows. Each idea here can fit different rooms, window types, and budgets. Small changes can make a big difference. Take your time, follow safety tips, and enjoy the process.