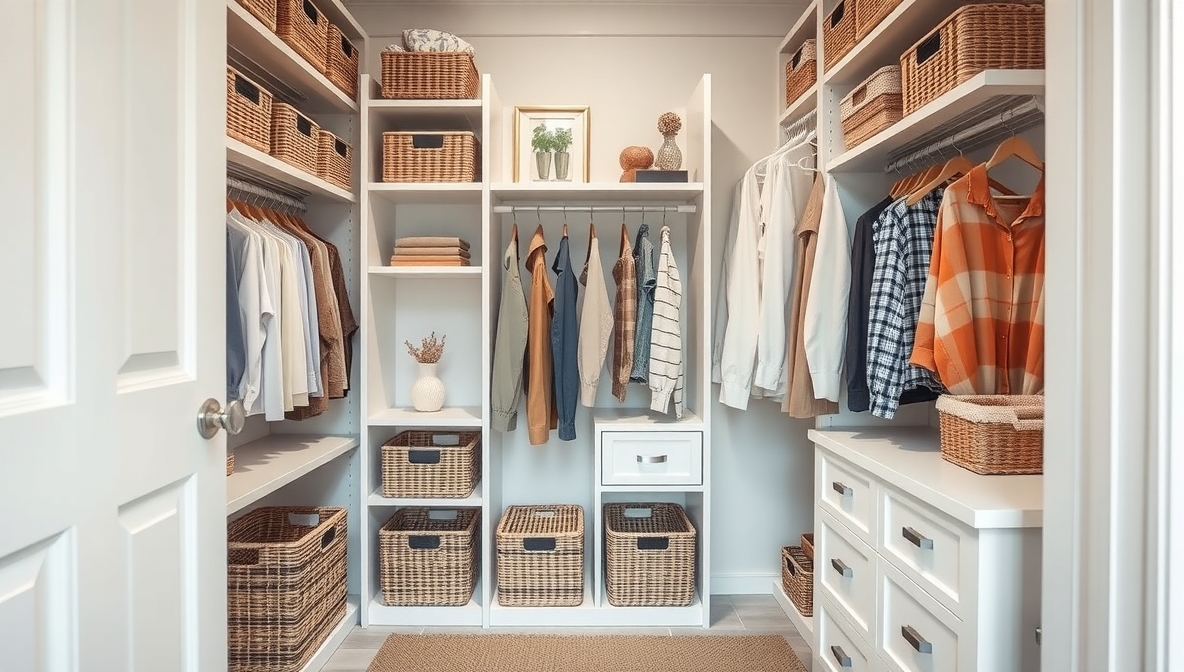
Small closets often feel more like puzzles than storage spaces, but the right approach can unlock their full potential. An organized, stylish closet doesn’t require a major renovation or a massive footprint. It starts with smart solutions that prioritize both form and function. From shelf risers to sleek hanging organizers, every detail plays a role in maximizing space.
Most small closets fall short not because of size but because of underused vertical space and poorly chosen accessories. Clear containers, labeled bins, and multipurpose hangers can make a world of difference. Adding lighting can brighten dark corners and instantly elevate the look and feel. Even simple tweaks like uniform hangers or a second hanging rod can double capacity and create visual harmony.
Statement hooks or bold wallpaper offer personality without clutter, making the space feel curated rather than cramped. A few intentional updates can completely reshape how the closet serves daily routines. This blog shares creative, practical ideas designed to help small closets do more with less—without sacrificing style. Dive in and discover how to turn a tight spot into your favorite nook.
DIY Small Closet Ideas: 10 Easy Projects to Maximize Your Space
Small closets can feel cramped, messy, and hard to use. But with a few simple tools and easy projects, you can turn your tiny closet into a neat and useful space. These 10 DIY small closet ideas are simple, affordable, and great for beginners. Each idea includes materials and easy steps to help you start.
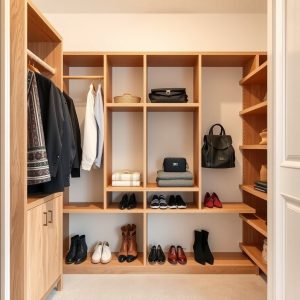
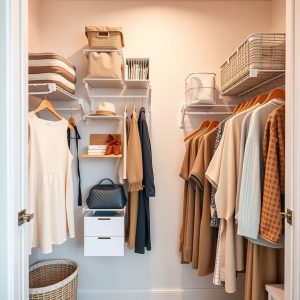
1. Build Simple Wooden Shelves
Materials:
¾-inch plywood
1×4 wood boards
Wood screws
Wood glue
Paint or wood stain (optional)
Drill and saw
Steps:
Measure the closet’s width, depth, and height.
Cut plywood to fit inside as shelves.
Screw 1×4 boards into the wall as shelf supports.
Set the plywood shelves on the supports and secure them.
Paint or stain the shelves if you want.
This gives you solid shelf space for folded clothes, shoes, or storage bins.
2. Install a Double Hanging Rod
Materials:
Two closet rods
Rod brackets
Screws and wall anchors
Drill and level
Steps:
Mark spots for the top and bottom rods.
Install brackets near the top for the upper rod.
Place brackets about 3 feet below for the lower rod.
Attach the rods to the brackets.
Now you can hang shirts on top and pants or skirts below. Twice the space, same closet.
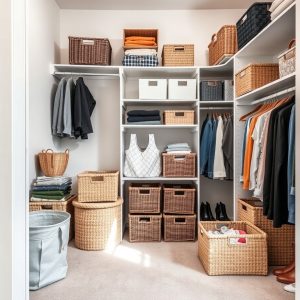
3. Use Baskets and Bins for Accessories
Materials:
Wicker or plastic bins
Labels (optional)
Steps:
Place baskets on the floor or shelves.
Sort small items like scarves, belts, or hats into each bin.
Add labels to make it easy to find things.
This keeps loose items in one place and makes your closet look clean.
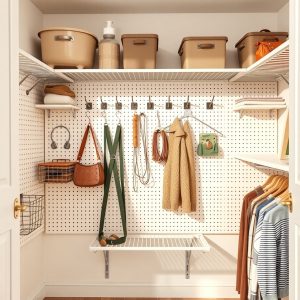
4. Add Motion-Sensor LED Lights
Materials:
Rechargeable motion-sensor LED lights
Adhesive strips or screws
Steps:
Charge the lights fully before use.
Attach them to closet walls or shelves using adhesive or screws.
Make sure the sensor points toward the door.
These lights turn on when you open the door and help you see everything inside.
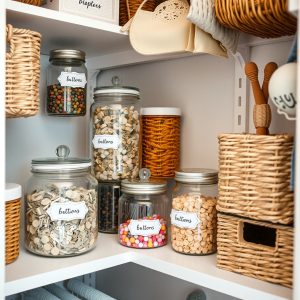
5. Repurpose Glass Jars for Small Items
Materials:
Clean jars with lids
Paint (optional)
Labels
Steps:
Wash and dry the jars.
Paint the lids to match your style, if you want.
Label each jar.
Use them to store jewelry, buttons, or small items.
You get tidy storage while reusing things you already have.
6. Install Under-Shelf Baskets
Materials:
Wire under-shelf baskets
Steps:
Slide the basket hooks onto an existing shelf.
Push until secure and level.
Use them for socks, scarves, or papers.
This adds more space without tools or major changes.
7. Use Over-the-Door Organizers
Materials:
Over-the-door organizer
Steps:
Hang it over the closet door.
Fill pockets with shoes, hair tools, or folded shirts.
It’s a smart way to use door space without taking up room inside.
8. Hang Hooks on Empty Walls
Materials:
Wall or adhesive hooks
Screws or adhesive backing
Steps:
Pick empty wall areas inside your closet.
Attach the hooks where needed.
Hang items like hats, bags, or jewelry.
Hooks turn empty wall space into extra storage.
9. Create a Pegboard Organizer
Materials:
Pegboard cut to fit wall
Pegboard hooks
Mounting screws
Steps:
Mount pegboard on a closet wall.
Place hooks where needed.
Hang items like belts, necklaces, or small tools.
Pegboards are easy to change around and fit different items.
10. Use Clear Storage Boxes
Materials:
Clear plastic boxes with lids
Labels
Steps:
Place items like shoes or winter clothes in the boxes.
Add a label to each box.
Stack boxes on shelves or the closet floor.
Clear boxes help you see what’s inside without opening everything.
FAQs
Q1: How can I get more space in a small closet? Use every inch of space. Add shelves, double rods, and door organizers. Store small items in bins or jars to keep the floor clear.
Q2: What are some cheap ways to organize my closet? Use things you already have. Try glass jars, baskets, or clear plastic boxes. Add hooks or small lights to improve the space.
Q3: How do I keep my closet neat after organizing? Put items back in their spot every time. Clean it out often. Don’t keep things you don’t wear or use.
Conclusion
You don’t need a big closet to stay organized. These 10 DIY ideas can help you get more space and less mess. Start small. Pick one idea. Then slowly build your closet into a space that works better for you. Simple steps lead to big changes. Happy organizing!