![]()
Smart Wooden Storage Ideas You Can Build Today
Wood offers warmth, character, and timeless appeal that plastic bins and metal racks can’t match. With just a few tools and a weekend to spare, anyone can turn unused corners into functional works of art. Wood storage projects don’t just organize clutter—they elevate spaces with custom charm. A handcrafted shoe rack by the entryway, floating shelves made from reclaimed barn wood, or a rolling under-bed drawer with rustic handles can each bring order and beauty together in one stroke.
These DIY wooden storage ideas suit any skill level, from beginner builders to seasoned weekend warriors. Each project adds something unique to your home while cutting down on chaos. Crates become coffee tables with secret compartments. Wooden pallets morph into garden tool organizers. Even scrap wood finds new life as spice racks or bedside caddies.
Style doesn’t need to sacrifice function. With thoughtful design and a bit of elbow grease, these projects make space feel more intentional. Skip the store-bought clutter and build pieces that actually fit your home—and your lifestyle. Dive into clever designs that marry form with function and let the wood do the talking.
Table of Contents
Toggle10 DIY Wooden Storage Ideas
Wooden storage is both useful and stylish. You can use simple tools and basic materials to build helpful storage for any room. Most of these ideas work well with scrap wood, a saw, nails, wood glue, and a drill. Here are ten easy wooden storage ideas that are perfect for your home.
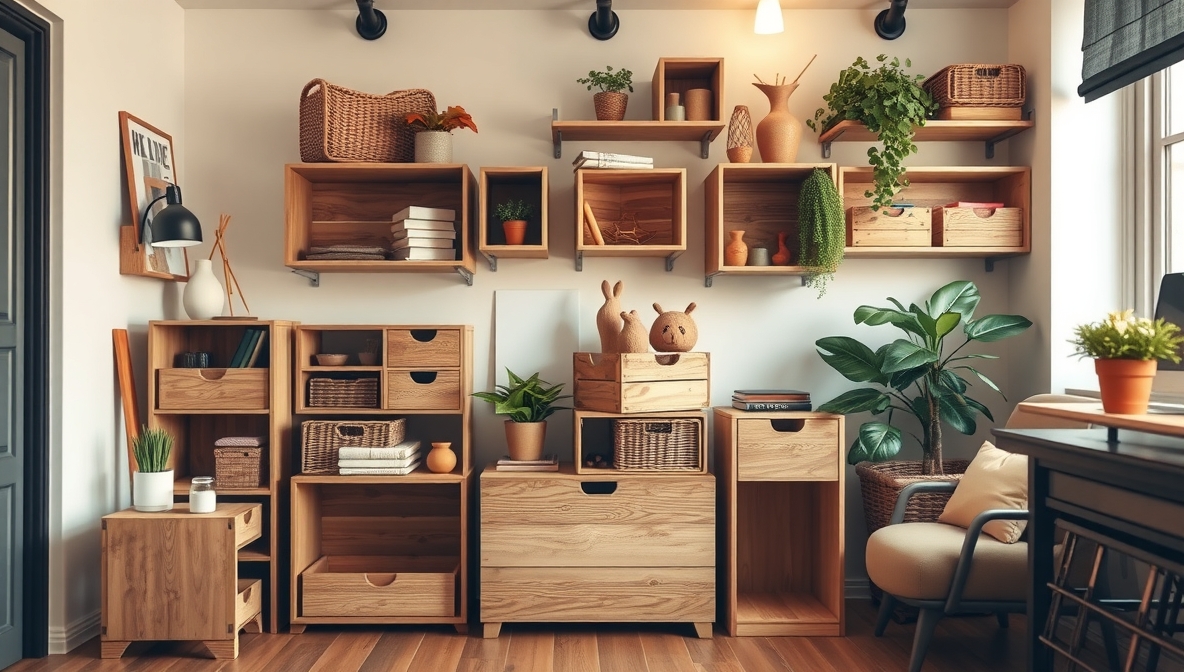
1. Wall-Mounted Crate Shelves

Materials: Wooden crates, screws, drill, wood stain or paint (optional)
Crate shelves save floor space. They give any wall a rustic touch. Arrange them in different layouts. Stack them or hang each one alone.
Steps:
- Stain or paint the crates (optional).
- Let them dry fully.
- Use screws to fix the crates to the wall. Make sure they are level.
- Fill them with books, decor, or jars.
Great for: Living rooms, bedrooms, or bathrooms.
2. Under-Bed Wooden Drawer
Materials: Plywood, drawer slides, screws, handles, paint or stain
This idea adds storage in a spot that often stays empty.
Steps:
- Measure the space under your bed.
- Cut plywood to match.
- Assemble a box using screws.
- Add drawer slides on the sides.
- Attach handles.
- Paint or stain it (optional).
Great for: Clothes, toys, or blankets.
3. Wooden Shoe Rack Bench

Materials: 2x4s, plywood, screws, sandpaper, stain or paint
Store shoes and have a place to sit. This bench fits near doors or in hallways.
Steps:
- Cut the wood to size.
- Build a bench frame with space below.
- Add shelves for shoes.
- Sand all rough edges.
- Paint or stain it.
Great for: Entryways or mudrooms.
4. Hanging Wood Peg Rail
Materials: Wooden board, wooden pegs or dowels, wood glue, drill, screws
This peg rail works for bags, hats, or kitchen tools.
Steps:
- Drill holes into the board.
- Glue the pegs into the holes.
- Let the glue dry.
- Screw the rail to the wall.
Great for: Kitchens, halls, or bathrooms.
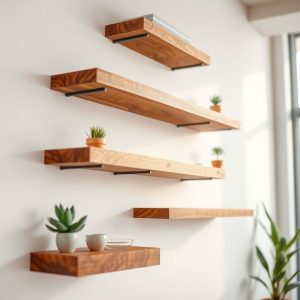
5. Floating Wooden Shelves
Materials: Solid wood boards, brackets, screws, level, stain or paint
These shelves look modern and clean. Use them for books, plants, or decor.
Steps:
- Cut boards to your desired length.
- Sand and stain or paint.
- Fix brackets to the wall.
- Place shelves on brackets and screw them down.
Great for: Living rooms or bedrooms.
6. Wooden Storage Cubes
Materials: Plywood or MDF, screws, wood glue, paint or stain
These cubes stack or stand alone. You can use them to store baskets, toys, or books.
Steps:
- Cut pieces to form cubes.
- Glue and screw the sides together.
- Sand the edges.
- Paint or stain the cubes.
Great for: Kids’ rooms, offices, or living rooms.
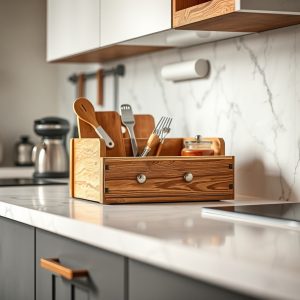
7. Kitchen Countertop Organizer
Materials: Small wood planks, nails or wood glue, stain
This helps clear countertop mess. Use it to hold spices, jars, or kitchen towels.
Steps:
- Cut the wood into small shelves.
- Use glue or nails to build a small rack.
- Sand and stain the wood.
Great for: Small kitchens or pantries.
8. Wooden Ladder Shelf
Materials: 2x2s or 2x4s, wood planks, screws, drill, paint or stain
This shelf leans against a wall. It gives you vertical space.
Steps:
- Cut two long pieces for the sides.
- Cut planks for the shelves.
- Screw the shelves between the side rails.
- Sand and finish.
Great for: Plants, books, or towels.
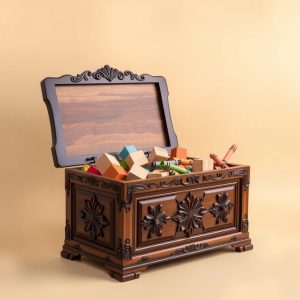
9. Wooden Toy Box with Lid
Materials: Plywood, hinges, screws, paint or stain
Keep toys tidy with this box. The lid keeps dust out.
Steps:
- Cut wood to build a box.
- Screw the sides together.
- Attach the lid with hinges.
- Sand and paint or stain.
Great for: Playrooms or kids’ bedrooms.
10. Wooden Wall Mail Organizer
Materials: Wood boards, small nails, hooks (optional), stain or paint
Sort mail and notes with this easy wall unit.
Steps:
- Cut boards to make small pockets.
- Nail pockets onto a flat board.
- Add hooks at the bottom (optional).
- Stain or paint it.
Great for: Entryways or home offices.
FAQs
Q: Do I need power tools to make these storage ideas?
You can use basic hand tools, but a drill and saw will help a lot.
Q: What type of wood is best for DIY storage?
Pine is cheap and easy to work with. Plywood is good for box shapes.
Q: Can I paint instead of staining the wood?
Yes. Paint gives color. Stain shows the wood grain.
Q: How can I make my storage more durable?
Use screws, not just glue. Sand the wood. Add a finish like varnish.
Q: Where can I find wood for these projects?
Check hardware stores. You can also use leftover wood from old furniture.
Conclusion
Wooden storage is easy to build and useful in every room. You don’t need fancy tools. Just basic supplies and time. Try one project at a time. Soon your home will feel more organized and warm. Start with crates or shelves. Then move to drawers or benches. Step by step, it all adds up.