![]()
Genius DIY Garage Organization Ideas That Actually Work
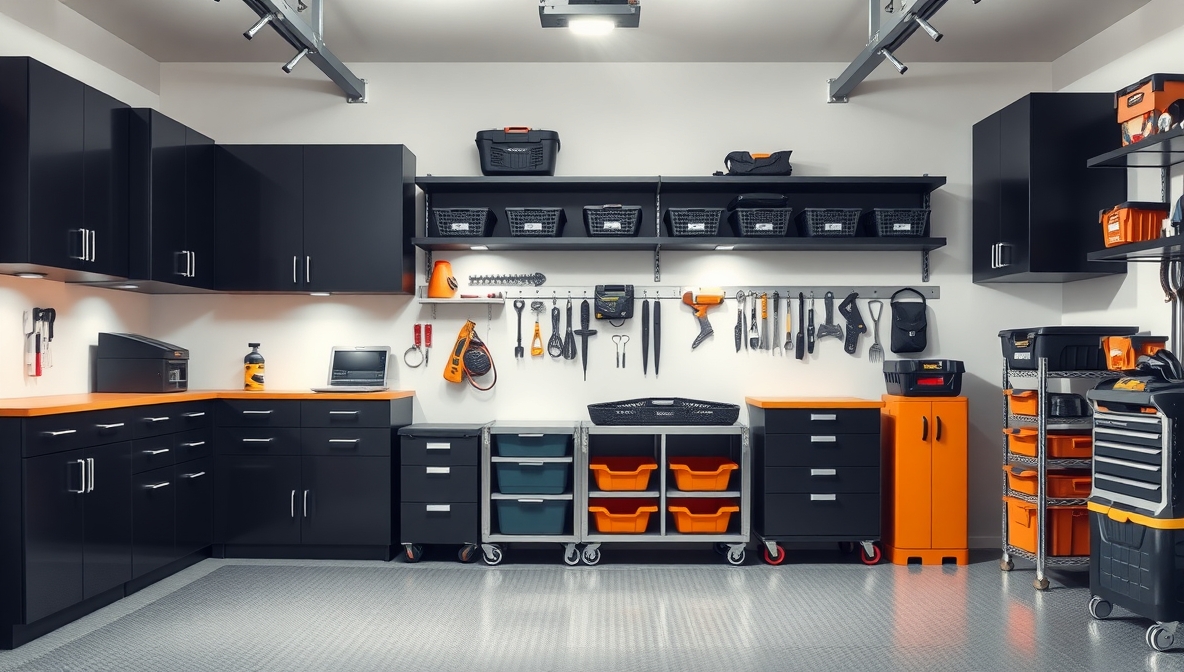
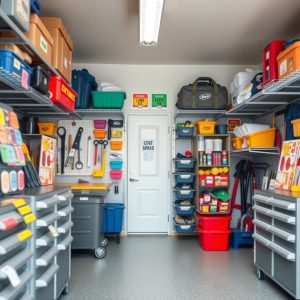
A cluttered garage quickly turns into a black hole for tools, gear, and forgotten projects. With a little creativity and some hands-on effort, that catch-all space can become a functional, organized zone you’ll actually want to spend time in. Buckets of unused hardware, scattered sports equipment, and leaning ladders don’t have to rule the room anymore. Smart DIY garage organization ideas offer practical solutions that don’t break the bank.
Strategic shelving, pegboards, overhead storage, and labeled bins do more than tidy up—they unlock space you didn’t even know existed. Every square foot can pull its weight, from floor to ceiling. These ideas go beyond basic cleanup; they focus on building systems that last and make daily routines smoother.
Grab your tools, clear some floor space, and dive into smart ways to reclaim your garage with style and function. Your Saturday mornings just got a whole lot more productive.
Garage Organization Ideas DIY
A messy garage can cause stress. Tools go missing. Boxes pile up. Cars don’t fit. The good news? You can fix it with a few smart, do-it-yourself tricks. You don’t need to be a pro. Just a few tools, a little time, and the right plan.
Here are ten easy and budget-friendly garage organization ideas. All of them use common materials. Each idea comes with simple steps. No confusing words. No complex tools. Just real help to make your garage clean and useful again.
1. Wall-Mounted Tool Rack
Tools on the floor take up space. A wall rack keeps everything in one place.
Materials Needed:
-
Wooden board (2×4)
-
Nails or screws
-
Drill
-
Hooks or pegboard hooks
Steps:
-
Find a free wall in your garage.
-
Cut the wooden board to fit your space.
-
Drill it into the wall using screws.
-
Add hooks for each tool.
-
Hang hammers, screwdrivers, and more.
This idea saves floor space. It also helps you find tools fast.
2. Ceiling Storage Shelves
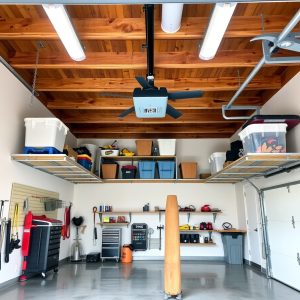
The ceiling is often unused. That space is perfect for long-term storage.
Materials Needed:
-
Plywood sheets
-
Metal brackets or L-shaped shelf supports
-
Screws
-
Drill
Steps:
-
Measure the space above your garage door or along the ceiling.
-
Cut plywood to fit.
-
Drill metal brackets into ceiling beams.
-
Place the plywood on top to create a shelf.
-
Store light boxes or holiday items.
This shelf works well for things you don’t use every day.
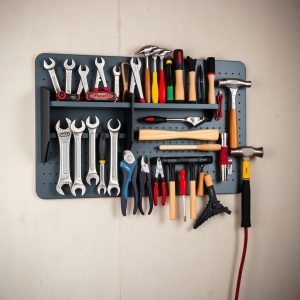
3. DIY Pegboard Wall

A pegboard keeps your tools visible. It works better than drawers.
Materials Needed:
-
Pegboard sheet
-
Wood strips
-
Screws and washers
-
Drill
-
Pegboard hooks
Steps:
-
Screw wood strips to the wall to create space behind the pegboard.
-
Place the pegboard over the strips.
-
Drill it into the wood using screws and washers.
-
Add hooks and arrange your tools.
Change it anytime. Move hooks. Add more tools. It’s flexible and neat.
4. Recycled Jar Storage for Screws and Nails
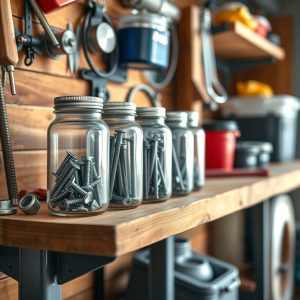
Small items often get lost. This idea keeps them all together.
Materials Needed:
-
Empty jars with lids
-
Screws
-
Wooden plank
-
Drill
Steps:
-
Nail or screw the wooden plank under a shelf.
-
Drill holes in the lids of jars.
-
Screw each lid into the plank.
-
Fill jars with nails, screws, and bolts.
-
Twist jars onto the lids to store them.
It looks clean. And you always know where things are.
5. DIY Bike Rack from PVC Pipes
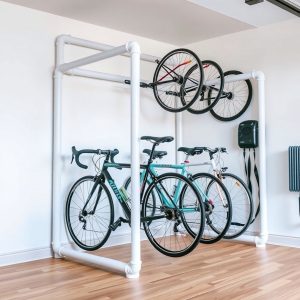
Bikes lean, fall, and take up room. A PVC bike rack keeps them in line.
Materials Needed:
-
PVC pipes (1.5-inch thick)
-
PVC elbows and T-joints
-
Saw
-
Glue
Steps:
-
Measure the width of your bikes’ tires.
-
Cut the PVC pipes into the needed lengths.
-
Connect the pieces using elbows and T-joints to build a rack.
-
Use glue to secure them.
-
Slide bikes into the slots.
This keeps bikes upright. Even kids can use it easily.
6. Magnetic Strip for Metal Tools
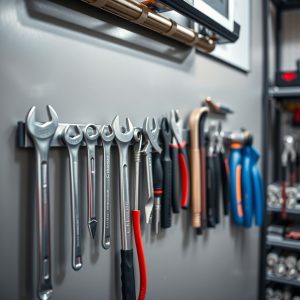
Some tools need fast access. A magnetic strip keeps them ready.
Materials Needed:
-
Magnetic knife strip
-
Screws
-
Drill
Steps:
-
Pick a spot near your workbench.
-
Drill the strip into the wall.
-
Place metal tools like pliers and wrenches on the strip.
It’s simple. And looks cool, too.
7. Fold-Down Workbench
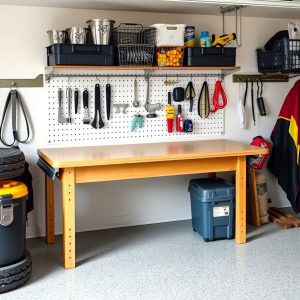
A full workbench takes up space. This one folds up when not in use.
Materials Needed:
-
Plywood
-
Hinges
-
Wooden legs
-
Screws
-
Drill
Steps:
-
Cut plywood for your bench size.
-
Attach the plywood to the wall using strong hinges.
-
Add folding legs under the board.
-
Add a latch to hold it flat when folded.
You get a full work area. Then fold it back to save room.
8. Shoe Organizer for Spray Cans and Bottles
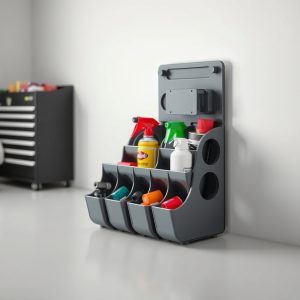
These clear hangers are not just for shoes. They hold spray cans, too.
Materials Needed:
-
Clear plastic shoe organizer
-
Screws or nails
Steps:
-
Hang the shoe organizer on the back of the garage door or wall.
-
Slide in spray cans, oil bottles, or glue.
You can see everything. No more digging through shelves.
9. Crate Shelves for Sports Gear
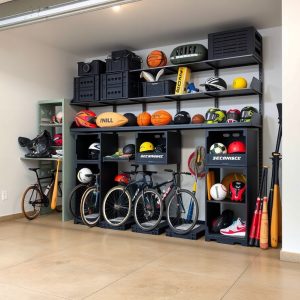
Balls and bats often clutter corners. Crate shelves fix that.
Materials Needed:
-
Plastic or wooden crates
-
Zip ties or screws
-
Drill
Steps:
-
Stack crates on their sides.
-
Use zip ties or screws to hold them together.
-
Anchor them to the wall for safety.
Each crate holds something different—balls, gloves, or helmets.
10. Label Everything with DIY Tags
Knowing what’s inside helps a lot. Tags keep it clear.
Materials Needed:
-
Masking tape or label stickers
-
Marker
Steps:
-
Write clear names on each label—like “Drill Bits” or “Car Wash.”
-
Stick the labels on bins, shelves, and jars.
It takes only a few minutes. But it makes a big difference.
FAQs
What is the best way to start organizing a garage?
Start by clearing everything out. Sweep the floor. Sort items into piles: keep, toss, and donate.
How do I keep my garage clean after organizing?
Label storage boxes. Use shelves and racks. Put things back after using them.
Can I organize my garage on a small budget?
Yes. Many ideas use things you already have—like jars, crates, and scrap wood.
Do I need professional tools to do this?
No. Basic tools like a drill, screwdriver, and saw are enough for most of these ideas.
How long will it take to organize a garage?
A small garage may take a few hours. A big one may take a weekend. Work in parts if needed.
Conclusion
A clean garage is easier to use. You don’t need a lot of money or experience. Just simple materials and smart ideas. These ten DIY tips can help you turn chaos into calm. Start with one idea. Then add more as you go.
Bit by bit, your garage will become a space you enjoy using. Not just a place to dump things. Happy organizing!